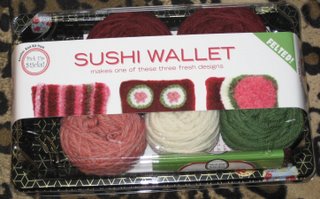
Then, when I got home, this was in my mailbox:
Kelly sent me this for rolling the comment counter on her blog! Very nifty.
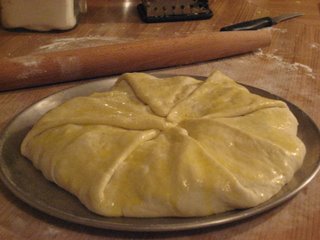
And the perfect end to the day? Perfectly risen pizza dough:
Ciao
Then, when I got home, this was in my mailbox:
Kelly sent me this for rolling the comment counter on her blog! Very nifty.
And the perfect end to the day? Perfectly risen pizza dough:
Ciao
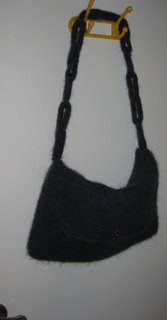
What do y'all think? Is it the dark colours maybe? I'm debating making one in a brighter colour, maybe that would make me feel less old....
In other news, I am test knitting a sock for Ramona. I'm having a hard time finding yarn for it. Preferably a solid colour yarn. Locally, all I can find is Sisu. It's sucks. It's splitty. Not a good thing when wrestling with a lace pattern on size 0 needles. So I ordered some sock yarn that is varied, but all in the same palette. ie. all blues or all greens. We'll see which one is best when it arrives. Sigh. I hate waiting.
ciao


Here is the rug in action. This only took me an evening to whip up.
This , on the other hand, is over a weeks worth of steady knitting:
The beginnings of Raspy.
I am really digging this knit. The dropped stitches are cool (I marked one for you on the pic!), the yarn is neat, and the overall pattern is fairly easy. All good things. I did decide to knit it in the round. The front and back are identical, so I figured I would skip some of the seaming this way. I'm also thinking I will make the boatneck a little narrower. I want to be able to wear a bra without the straps showing! (actually, I need to wear a bra..)
The yarn is Rowan Denim in Nashville Blue. It almost looks black, it's so dark. I like it!
And now, for your entertainment, a couple of "artsy" shots I took while messing around with the camera!

Frosted windows! I quite like the sparkliness of them. Although I don't like the cold they represent!
Ciao
They are fake fur mitties! I got them at the Portolano Factory Outlet last year. I love these mitts when it is this cold. Theyare snuggly and warm. My hubby just asked me when I got those mitts. When I told him last year he was a bit non-plussed.Ciao

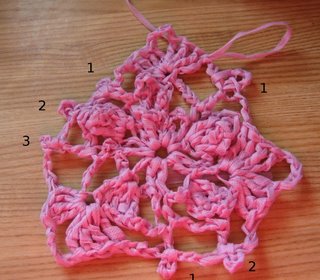
NOT what I got. As you can see, I have ONE side that has 2 picots. The other sides have 1 and 3 respectively. Although at least the thing has a passing resemblance to the item it is SUPPOSED to be. I think my problem was that I got lost in the pattern and did 1 too many repeats on one side and one too few on the other side. I did get it right on the third side.
So this will be going swimming in the frog pond. On the bright side, Once I figure out how to actually follow the pattern, I should be zipping along.
The "yarn" I am using is Rowan R2 Paper that I got a deal on since it is discontinued. I really like the pink. Which is unusual for me. I am not generally a "pink" kinda girl.
In other news, I spent today running around getting my passport renewal papers together. What a pain. AND I get to give the govenment of Canada $102.00 for the privilege.
Ciao

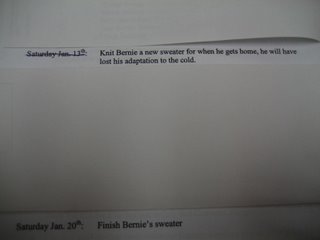
(Bernie is the owner and he is on vacation somewhere warm.)
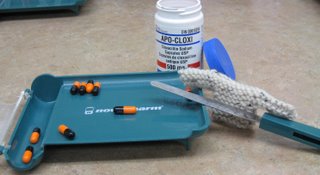
Naturally, since I am a good relief pharmacist, I have followed instructions. 
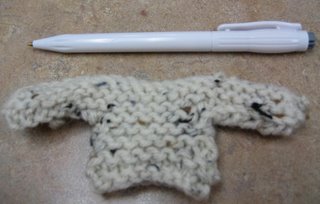
Pen is included for scale. You will note Bernie did not specify what size the sweater is to be. The size is implied but not stated.
An action shot:

Ciao


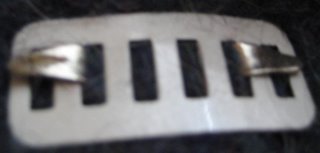
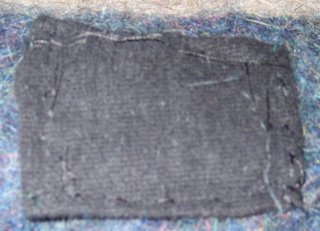
There's a backing that you push the prongs through before you bend them down. This spreads the strain out over a larger surface area. However, when you put things in and out of the purse, you might catch the prongs. So I covered them up with some material I had lying around.
It's a crappy example of hand-sewing, but what do you expect? It was black on dark blue. And I have never claimed to be good at it. But since it's on the inside, who cares? Then I sewed a division up the inside pocket. Since the purse turned out a little larger than I had anticipated, I figured a division would keep things from getting jumbled together.
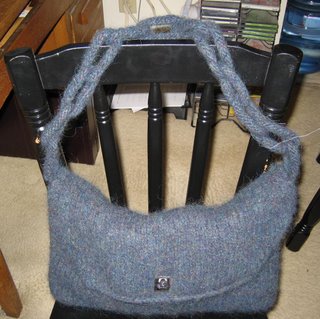
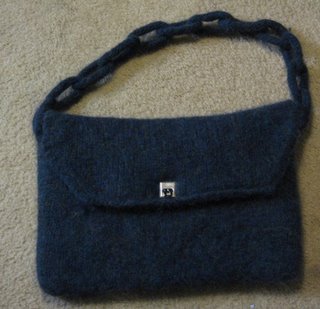
The final product....TA DA!!!!!!

Basic stats:
Pattern: Runabout Bag , but I cast on 100 stitches instead of 66 as called for in the pattern. I used the Marley's Ghost pattern for the strap. I knitted up 12 links.
Yarn: Lopi
Needles: Whatever it was the pattern called for, I don't remember and am too lazy to get up to find out.
Hardware: A clasp I salvaged from a second hand purse.
Ciao

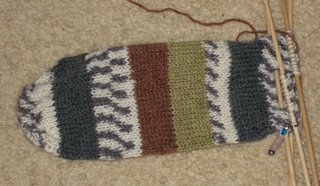
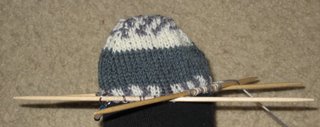
My confetti sock continues. I had it farther along, had even turned the heel. However, the heel fit funny. That's a technical term. I think I started it too early. So I took it swimming in the pond and am knitting the foot a little longer.
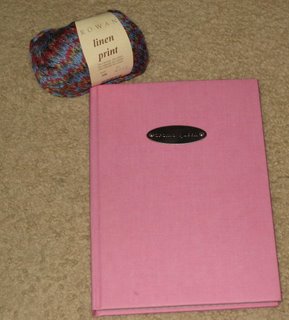
I also decided that I needed a journal to keep track of my knitting bits and pieces. Like how many stitches I cast on for this sock, for example. If I put this baby down and come back to it days or weeks later, I might not remember stuff I need to. Hence, a journal. 
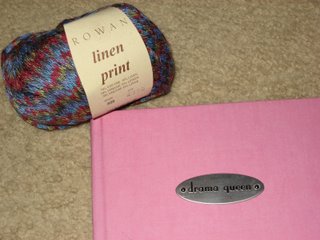
A closer look reveals that it is rather appropriate. (according to the hubby anyway)
I spent a whole $5 on this. They were clearing out some odds and ends.
The Rowan linen print was included for hmmm....yarnosity? Is that a word? Besides, aren't the colours just lovely? I've been fondling this for a couple of days now. I have 10 skeins , which works out to around 600 yards. So, enough for a tank top, I think. Especially as it knits up around 13 stitches per 4 inches. The problem is deciding which tank top! Any favourites out there? Preferably something knit in the round for minimal finishing....(although others will be considered)
Ciao

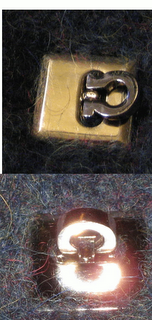
However, the idea WAS to get a bigger purse. I just hadn't planned on how big! Forging onwards....I wanted a specific type of clasp. I'm not sure what it's called, but I couldn't find one anywhere in town or on the internet. So I had a brilliant idea. I went to the local second hand shop (Value Village, to be exact), found a purse that had the clasp I wanted, bought it for $3.99 and ripped the clasp right off that sucker. This is what I'm talking about:
After much swearing, the clasp was affixed to the new purse. See?


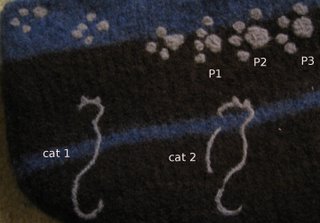
As you can see, there is a definite progression. The paw prints on the left are awful. The ones on the right are definitely better. Personally I like the one that is labelled P2 the best. However, it is done freehand, so no 2 will ever be exactly the same. As for the cat figure, I think cat 2 is more "cat-like". So what I was thinking was this: Put a row of pawprints along the bottom of the flap and up one side. Then put a cat figure at the top at the end of the paw prints. Or do you think it would be too much stuff?
Ciao
That's right. I finished a pair of socks and have already cast on for another pair. I am using some yarn gifted to me for my birthday. It's Confetti superwash yarn. Self-striping. This time around I used the magic cast on from Knitty, as suggested by Laura. (Thanks!) This avoids the provisional cast on that I used for my first pair of toe up socks. The magic cast on is not difficult, yet it took me 3 tries to get it right. The first time I cast on the total mumber of stitches, forgetting that I would need to do some increases for the correct shape. The second time I did the increases wrong. (On the bottom for the foot, if you must know.) Third time appeared to be the charm.
My husband walked by while I was struggling with the cast on and commented that it looked like I was either doing a Chinese puzzle or finger-wrestling sticks! I admit, it does look pretty awkward. Especially if you don't know what you are doing. (That would be me)
All awkwardness aside, it does work, and having done it three times now, I can say that it is pretty easy.
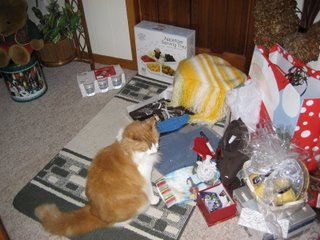
And now, a gratuitous kitty picture. Here is AJ, my MIL's cat at Christmas.
"Wow! Is all this stuff for me?!"
Ciao

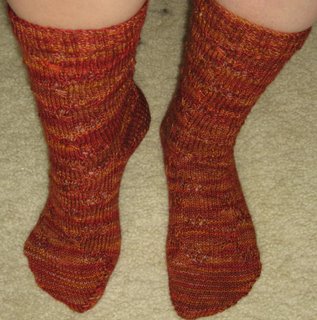
I am so pleased with how theses socks turned out! My first toe-ups, my first short-row heel, my first not-straight-stockinette AND my first Elizabeth Zimmerman sewn stretchy cast-off!
Basic stats
Yarn: Fleece Artist sock yarn
Colour: Autumn Leaves I think, I can't find the ball-band.
Needles: Size 2 (2.5mm) DPN's
Pattern: Cat's Face Lace Socks
I'm off to continue F'ing O's! I'm on a f'ing roll!
Ciao

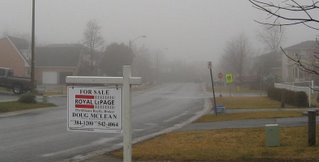
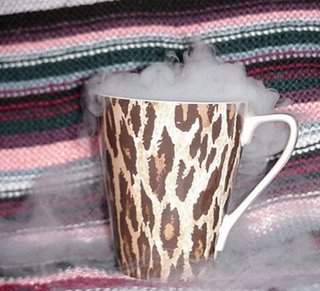
Many of you are probably wondering why fog would remind me of Italy. My family comes from a town called Novara in the Piedmont region. The name of Novara derives from Nubilaria, meaning "city wrapped in fog". If you are more interested in the region, check here. The name is totally apt. The fogs in this region are legendary. You cannot see the hand at the end of your arm in the fogs they get and they last for days. I am not exaggerating. Grandma used to tell us a story about one night when she and grandpa were driving home in the fog. Very slowly, because grandpa couldn't see where he was going. So grandma had the passenger side window open and her head stuck out the side so she could watch the yellow line painted at the side of the road to make sure they didn't veer off into the ditch! This was always accompanied with gleeful shouts of "right, right, right, no LEFT LEFT !" We loved this story as kids.
It is a bit scarier to actually be driving in it. Those of you who have driven in a blizzard are familiar with the term "white-out", right? Well, that's what happens in fog too. Your headlights get bounced back at you something ferocious.
So today is reminiscent of that fog. Only because we still have the fog at 1pm, not because it is a pea soup fog. Thank goodness.
Ciao

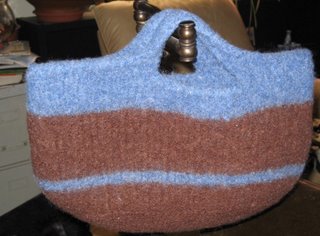
A new purse! This is a larger version of the Runabout Bag that I made before. It's a lovely bag. But it. Is. Too.Small. I carry way too much crap with me. Although it really is the essentials. The problem is that I have to carry my "office" with me in case I get bookings. Hence a cell phone & a PDA (I don't like the combo phone/PDA thingies). I have to bring my hearing aid remote control with me. Spare batteries for the hearing aids. A comb. Chapstick. My wallet. So. A larger bag it is! It's not black. That is actually "Pond Heather", a dark teal /blue/green. Yes, the inner pocket that I have laid on the outside is 2 toned. I had some left over lopi from a previous project. Since this was going on the inside, who cares that it is 2 colours?
I forgot to take a picture, but the handle is NOT going to be I-cord! Had enough of that the last time! Besides, I found this pattern and thought it would make a good strap for the purse.
Moving on. I was at work, knitting on my sock. (yeah, I knit at work, ya gonna do something about it?) When disaster struck!

Naturally I did not have a spare. There was no crazy glue in the store. Eeek! I tried taping it together, but then the needle was too thick and moving my stitches was a chore. So I had to put it down and read my book instead. Quelle dommage.
Happily, I do have a spare set at home.
Ciao

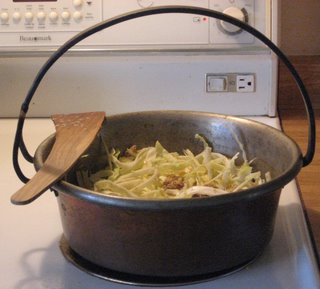
Above, we have it simmering away. In the traditional pot, I might add!

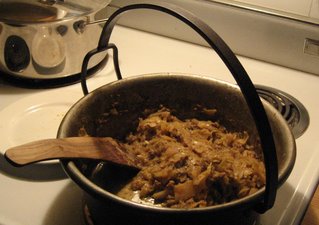
Ta Da! The finished product. I know it looks kinda messy. It IS kinda messy, but oh so yummy!
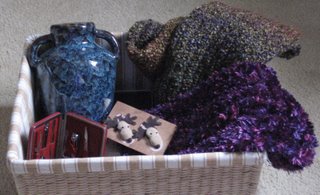
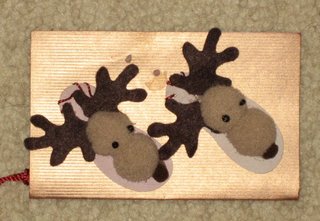
I will also do a quick round up of Christmas presents. Just for kicks!


She also got me a lovely bottle of Valentino perfume. Blogger is being stupid and won't load the picture, so trust me when I say it's awesome. The more so as the perfume is actually discontinued! She found some while on vacation in Connecticut! I love this perfume.
Maybe tomorrow Blogger will behave. At any rate, That's the haul!
Ciao

I baked it for about 50 minutes at 325F. This is what it looked like after:
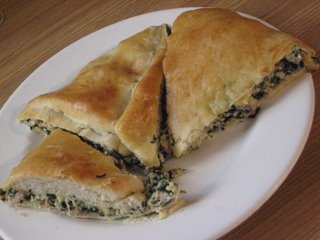
The filling looked like this:
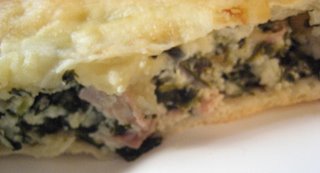
So, to the recipe. I made my regular pizza dough as follows:
Ingredients
1 package active traditional yeast
3/4 cup lukewarm water. (body temp water. If you dip your finger in it, the temperature of the water should be the same as your skin)
dash of sugar
some olive oil (upto 1/4 cup)
2 cups all purpose flour + some for adjustments
Directions:
Mix sugar and yeast in water. Stir to dissolve. Let sit for about 10 minutes. There should be a froth on the water at that point. If there isn't, your yeast is dead. Get fresh yeast.
Add olive oil into yeast mixture. Up to 1/4 cup. Less if you want, but do add some, it makes it tastier.
Pour yeast mix into flour. Stir with a fork at first and then dive right in with your hands and knead. After a few minutes you will have a smooth dough. If the flour isn't mixing into a dough, add a touch of water (a tablespoon or so at a time), if the dough is sticky, add some flour. (humidity levels in the air affect how it kneads up, hence the need to adjust)
Get a second bowl and coat with a thin film of olive oil to prevent sticking. Coat dough with thin film of olive oil to prevent drying. Put dough in bowl. I use a large bowl and cover the bowl with saran wrap. Set dough aside to rise for 90 minutes. It needs to be warm, so I put it into the oven with the oven light on. The light provides just a touch of heat and the oven keeps drafts away.
After 90 minutes your dough will have roughly doubled in size. Knead it for a couple of minutes. It is now ready for the second rising. At this point, you have made enough dough for 2 thin crust small pizzas. You can divide it in half and freeze it now, if you want to. When you want to use the frozen dough, take it out of the freezer the day before and put it in the fridge. Then, about an hour before you want to cook, take it out of the fridge and let it warm up to room temperature. If you are using it today, then let it rise a second time for 30 minutes. After that, it is ready to use.
If you are making pizza rustica , you will need all of the dough.
Pizza Rustica
Make dough as above.
Ingredients for Filling
1 box frozen chopped spinach, thawed.
450 gram (1 container) Ricotta cheese
100gram cooked ham chopped.
2 cloves garlic minced
1 small onion chopped
1 egg beaten
Directions
Preheat oven to 325F (Please note that if you are making a regular pizza, this temp should be 425F)
Mix ingredients for filling in bowl.
Roll out pizza dough. Place on pizza pan, cookie sheet, whatever.
Dump filling in middle of dough. Spread out a bit.
Fold dough over on top of filling until you have a "pie"
Brush egg over the outside of the dough so it will brown nicely.
Bake in oven for about 50 minutes.
Let cool on counter for 5 minutes or so before you cut into it.
Eat. Mmmmmm.
Please remember that this recipe can be modified pretty much any way you want to. I have seen recipes with sausage, eggs, seafood, you name it in the filling.
The dough is basic pizza dough. If you make a regular pizza, you should bake it at 425F. I know it seems high, but remember that originally pizza was (and often still is) baked in a fire heated oven. Fires are HOT! And lastly, if you can find it and can afford one, get a baking stone. Baking your pizza on that will make it very crispy.
I have more food pictures to share with you, but this post seems long enough as it is! So the paniscia cooking pictures will wait until tomorrow. I already posted that recipe, so if you really want to make it, just go right ahead!
Ciao